

Network Time Protocol (בראשי תיבות: NTP) הוא פרוטוקול תקשורת המאפשר סנכרון שעונים המתבסס על תקשורת TCP/IP. הפרוטוקול מתבסס על service או daemon שרץ על שרת המחובר לשעון אטומי, מקלט GPS או התקן זמן מדויק אחר, השרת עצמו נקרא לרוב שרת זמן (time server). כל מחשב המעוניין (ומורשה, במקרים מסוימים) להסתנכרן מול אותו התקן זמן מזדהה מול השרת בעזרת פרוטוקולים מוכרים או באופן אנונימי, אם הדבר מאופשר, ואז הוא יכול להסתנכרן מולו. בין השאר מתמודד הפרוטוקול עם השבתה של שרתי הזמן, חלוקת עומסים, שיפור הדרגתי של דיוק, תעדוף שרתים ועוד.
במדריך זה אסביר כיצד ניתן להתקין שרת NTP על גבי Docker ולהשתמש בו אצלכם ברשת לצורך סנכרון זמנים בין המכשירים השונים. אצלי בבית לדוגמה הוא משמש לסנכרון זמנין בין התקני ה IOT השונים.
אך לפני שנתחיל יש לוודא כי התקנתם סביבת docker ו- docker-compose על פי המדריך הבא.
שלב א – התקנת הקונטיינר והגדרה ראשונית
כעת, ערכו את קובץ ה docker-compose והוסיפו פנימה את הקוד הבא:
  chrony:
    image: publicarray/chrony:latest
    container_name: Chrony
    restart: unless-stopped
    ports:
    - 123:123/udp
    volumes:
    - ./chrony/chrony.conf:/etc/chrony.conf
    labels:
      - "com.ouroboros.enable=true"
    cap_add:
      - SYS_TIME
    network_mode: bridge
    labels:
      - "com.ouroboros.enable=true"
      - "traefik.enable=false"
- שימו לב לשורה של ה Volumes, לפני שמריצים את פקודת ה docker-compose יש לוודא שהוא קיים ושהקובץ מכיל את ההגדרות, לצורך כך כתבו את הפקודה הבאה:
sudo nano ./chrony/chrony.confוהדביקו פנימה את קטע הקוד הבא:
# Welcome to the chrony configuration file. See chrony.conf(5) for more
# information about usuable directives.

# This will use (up to):
# - 4 sources from ntp.ubuntu.com which some are ipv6 enabled
# - 2 sources from 2.ubuntu.pool.ntp.org which is ipv6 enabled as well
# - 1 source from [01].ubuntu.pool.ntp.org each (ipv4 only atm)
# This means by default, up to 6 dual-stack and up to 2 additional IPv4-only
# sources will be used.
# At the same time it retains some protection against one of the entries being
# down (compare to just using one of the lines). See (LP: #1754358) for the
# discussion.
#
# About using servers from the NTP Pool Project in general see (LP: #104525).
# Approved by Ubuntu Technical Board on 2011-02-08.
# See http://www.pool.ntp.org/join.html for more information.
#pool ntp.ubuntu.com        iburst maxsources 4
#pool 0.ubuntu.pool.ntp.org iburst maxsources 1
#pool 1.ubuntu.pool.ntp.org iburst maxsources 1
#pool 2.ubuntu.pool.ntp.org iburst maxsources 2

server 0.asia.pool.ntp.org iburst
server 1.asia.pool.ntp.org iburst
server 2.asia.pool.ntp.org iburst
server 3.asia.pool.ntp.org iburst

# This directive specify the location of the file containing ID/key pairs for
# NTP authentication.
keyfile /etc/chrony/chrony.keys

# This directive specify the file into which chronyd will store the rate
# information.
driftfile /var/lib/chrony/chrony.drift

# Uncomment the following line to turn logging on.
#log tracking measurements statistics

# Log files location.
logdir /var/log/chrony

# Stop bad estimates upsetting machine clock.
maxupdateskew 100.0

# This directive enables kernel synchronisation (every 11 minutes) of the
# real-time clock. Note that it can’t be used along with the 'rtcfile' directive.
rtcsync

# Step the system clock instead of slewing it if the adjustment is larger than
# one second, but only in the first three clock updates.
makestep 1 3

# add to the end : add network range you allow to receive time syncing requests from clients
allow 192.168.0.0/23
כאשר:
- allow 192.168.0.0/23 – מציין את כתובות הרשת המורשות להשתמש בשרותי ה NTP. וודאו כי ההגדרה מתאימה לרשת שלכם.
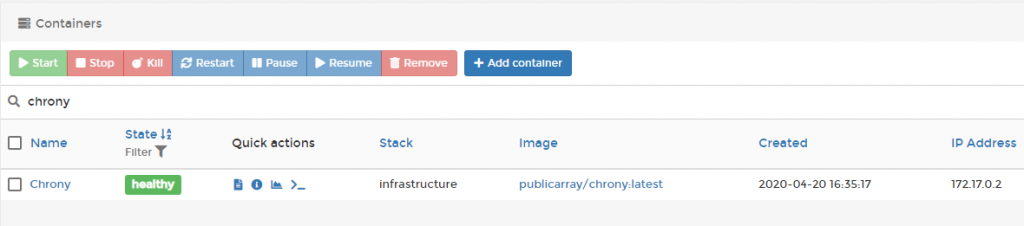
כעת הריצו את הפקוה sudo docker-compose up -d על מנת להתקין את הקונטיינר. אם ביצעתם הכל כראוי תוכלו לראות כי הקונטיינר רץ ועובד:
שלב ב' – הגדרת המכשירים ברשת לשימוש ה chrony
בשלב זה של המדריך אסביר כיצד להגדיר את הרכיבים השונים ברשת להשתמש בשרת על מנת לסנכרן את המחשב אל מול שרת ה NTP שזה עתה התקנו.
על מנת לסנכרן את שעון המחשב אל מול שרת ה NTP שזה עתה הגדרנו יש לפתוח את חלון ה CMD כמנהל ולהריץ את הפקודה הבאה:
net time \\ntp_server_address /set /yאפשרות נוסםת היא להריץ את הפקודות הבאות:
w32TM /config /syncfromflags:manual /manualpeerlist:ntp_server_addressw32tm /config /updatew32tm /resyncשימוש מועיל!
Leave a Reply